Without a doubt, Solidworks Routing package within the premium version of SW can be quite useful when creating electrical connections, pipes, or tubes. Unfortunately, a lot of us have to make-do without such handy tools. In this tutorial, I will cover how to create flexible tubings with just a few loft tools. The example model I am using is a minimal working example (MWE) so please excuse the crude design.
Problem
- Route a flexible tube between two connections that updates with the varying position of the end connections. |
| A flexible tube must be connected between the two highlighted profiles. |
Solution
1. First, create a cross-sectional sketch of the tube. Save the part.
 |
| Cross-sectional sketch of the tube |
3. Import the sketch, and mate it to one end of the connection. Make sure it is fully defined.
 |
| Mate the sketch to one end of the tube connection. |
4. Go into “Edit Component” mode for the tube, and click on any of the planes.

5. CTRL+DRAG the plane to create a new plane.

Define the plane to be coincident to the other end of the tube connection.

6. Make a sketch on this new plane of the tube cross section. Exit sketch.

7. While still in Edit Component mode, go to Features -> Lofted Boss/Base.
8. First we have to create the outer wall. So, designate the outer closed loop as the end geometries.
It will create the shortest-path connection, which ends up looking quite strange!

9. This can be easily fixed by clicking on Start/End Constraints, and setting them to be “Normal To Profile.” The orthogonal distance to profile can be edited here as well, but remember these values because we will need it soon.
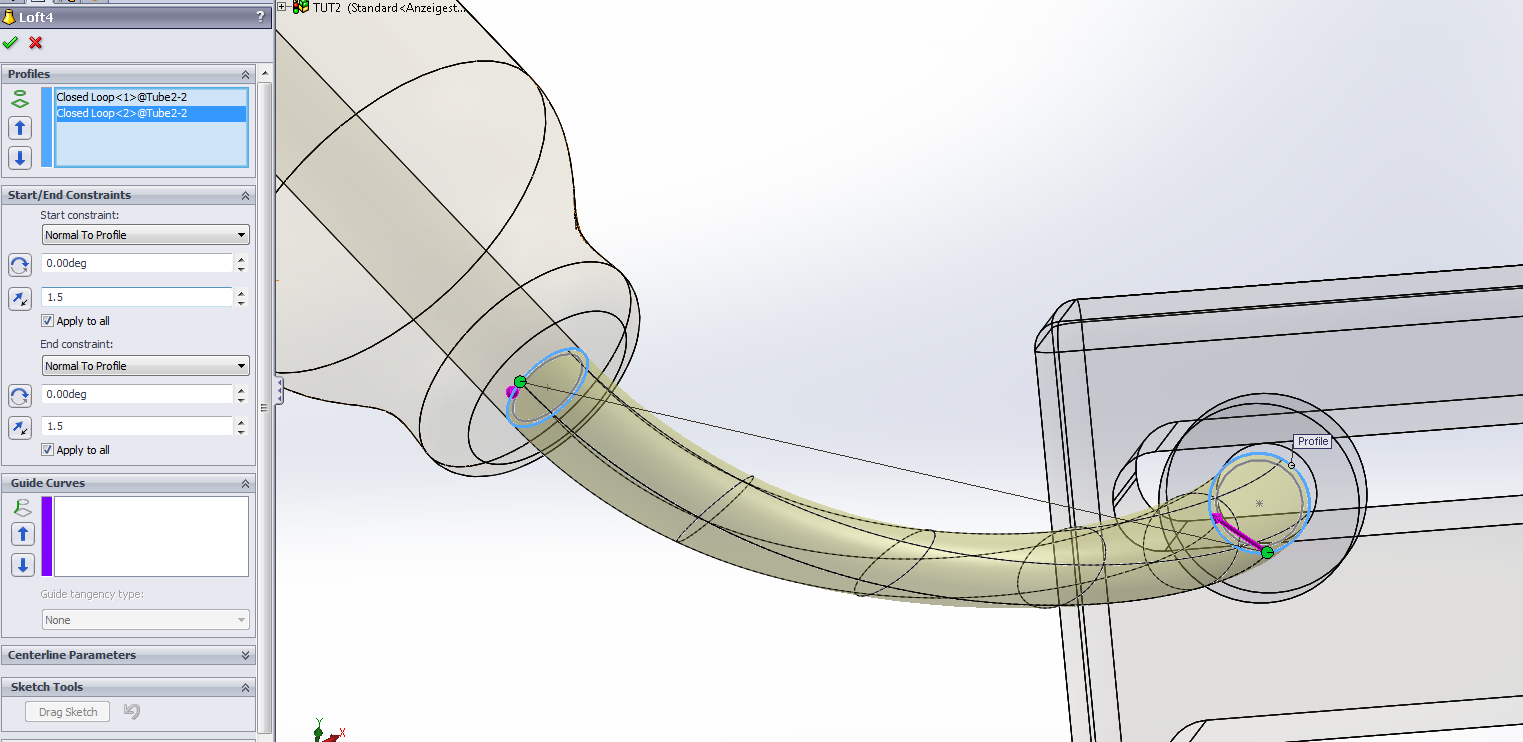
10. We have to now cut out the inside of the tube. To do this, first make the sketches in loft visible. (Click on the + sign beside Loft, right click on the sketches and click “Show”)
11. Go to Features -> Lofted Cut. Now click on the inner closed loops.
Set the same Start/End Constraints as before (do you remember those numbers? :O)

Now your tube is done!

You can open the original assembly without the tube, change the positions, and the assembly with the tube should update on its own.

Ta-da!
This comment has been removed by the author.
ReplyDelete